Here it is!
I finally managed to prepare everything for release. This is my first ever Python project and I used it to learn some scripting. There are a lot of beginner mistakes in code, but I hope those will be rewritten in time. You can also expect bugs and crashes, I gave my best to minimize them :)
Considering this, I'm pretty proud of this. Handling 1400+ lines of code for the first time python coder was challenging.
The tool should be functional and fun. I hope I managed to speedup some of lookdev challenges in your daily tasks.
You can download it from my ArtStation Marketplace. It is a Free tool, so consider leaving a small tip if you can:
Here is a features preview that I recorded 10 days ago. UI changed a bit, but all main features are still there.
Also, I created this cheat sheet just to quickly explain all the stuff in one image:

Click on the picture to zoom in
INSTALLATION:
You can find a lookdev_kit_install.txt file in the 7zip archive when you download Lookdev Kit 2.0 from ArtStation Marketplace where you can find all of the steps necessary to run the tool. But, I will explain them here again .
- copy entire lookdev_kit folder from .zip to your MyDocuments Maya scripts folder. It is usually here:
C:\Users\<user_name>\Documents\maya\scripts
- from folder lookdev_kit\shelf copy the shelf_dk_mtoa_lookdev.mel and paste it here:
Documents\maya\<maya_version>\prefs\shelves
- run Maya and you will have a shelf with LDV kit button
OR
If you don't want my shelf you can create button by yourself:
- open script editor and in PYTHON tab paste following code:
from lookdev_kit import ldv_kit
reload(ldv_kit)
ldv_kit.buildUI()
You can always select that code in script editor and middle-click-drag it to your shelf to create a button, so you can call it when needed.
After you run it, you will have to click on Refresh HDRs button


Bearded man sculpture model not included. Downloaded from www.myminifactory.com
HDR images and controls:
The HDR images stayed more or less the same as in the first version. I don't like some of them, so in the near future I will probably change some of them. Of course, new version of Lookdev Kit allows you use your own HDR images. You can just paste them in the HDR folder (lookdev_kit\sourceimages\hdr) and run Refresh HDRs command from Ui. There is also a button in Ui to open the folder that contains all HDRs.
HDR images taken from hdrihaven.com
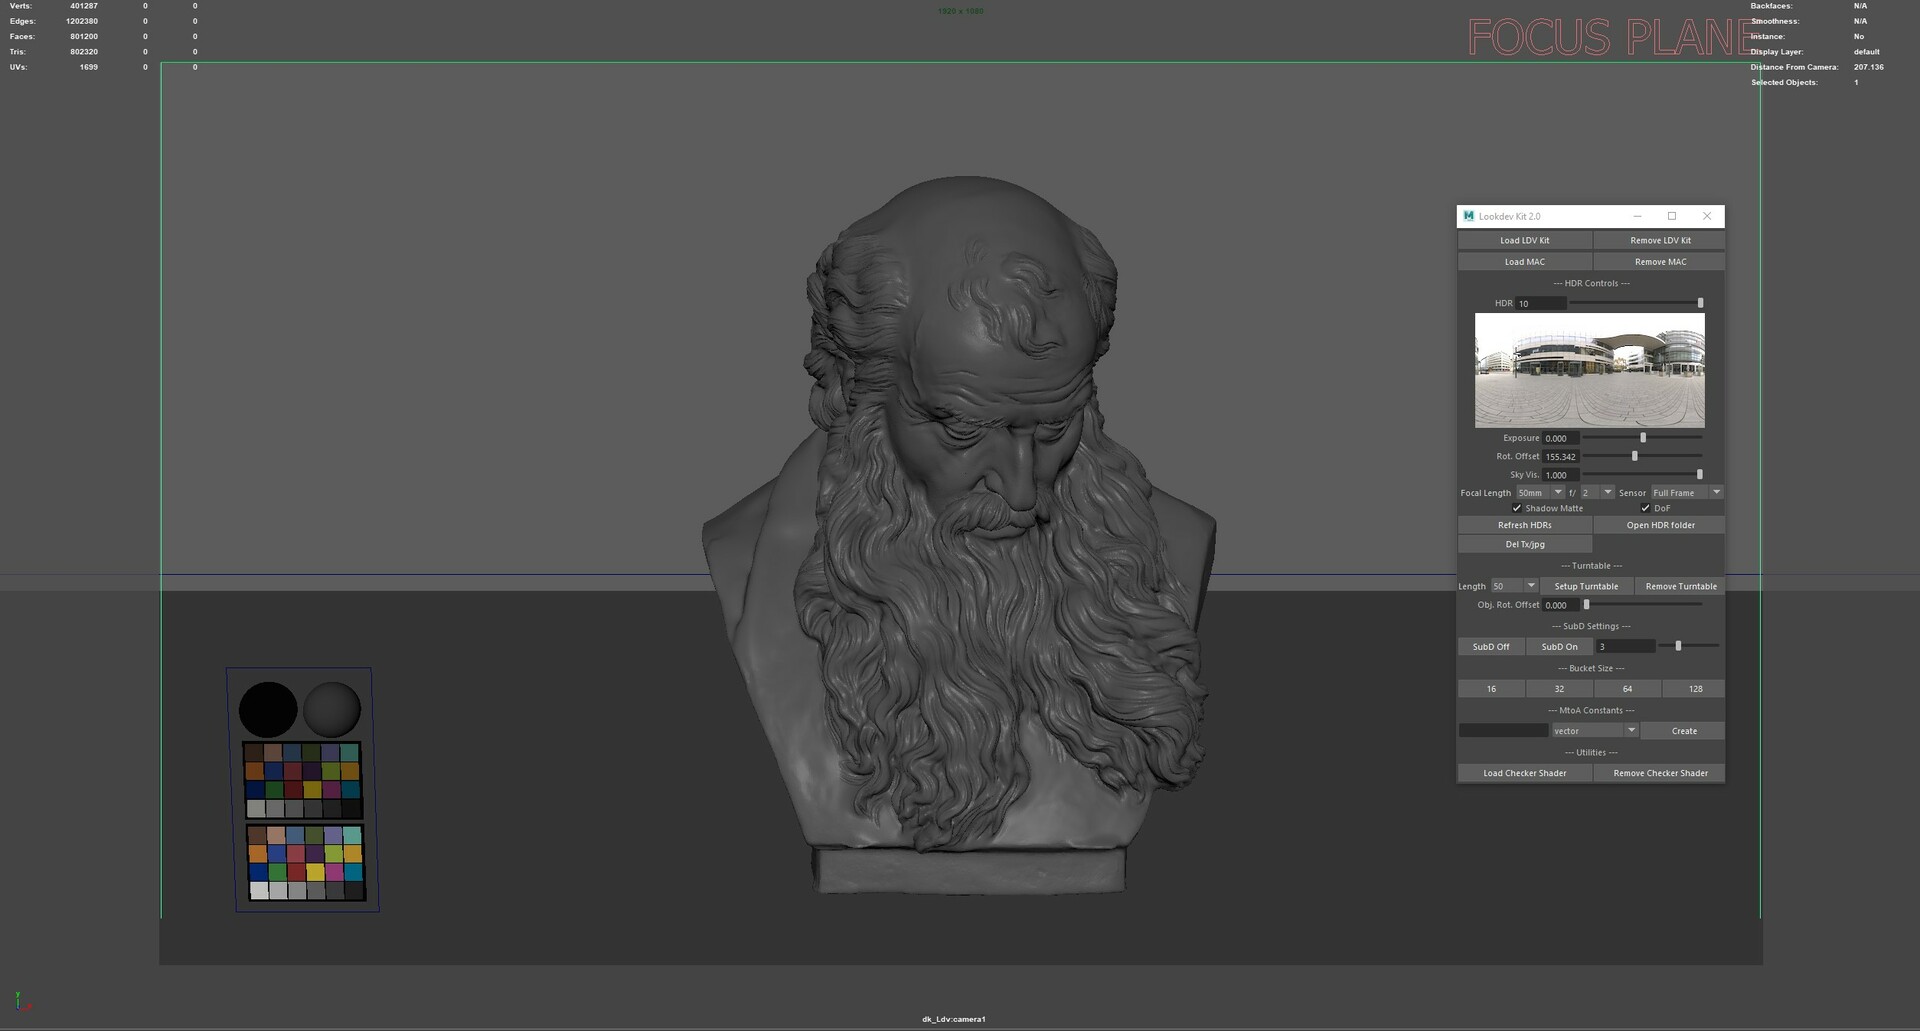
PHOTOGRAPHIC CONTROLS:
Because I'm a big fan of photography, I've included "photographic" controls for the camera that is included in the scene. You can change Focal length, Aperture and Sensor Size.
Focal length changes camera focal length.
Because Arnold camera settings doesn't show camera aperture in f-stops, but with number that represents camera aperture diameter in world units, I have created a script that allows you to choose aperture settings in f-stops. In the background it will recalculate the Arnold camera aperture diameter depending on the chosen f-stop setting in the Ui. It considers chosen Focal length and chosen f-stop in the calculation.
I've also included sensor size settings if you want to simulate different sensor sizes. 3 sensor types are included - Full Frame, APS-C (1.5x crop) and Micro 4/3 (2x crop). This setting will change your field of view on the camera, because sensor size influences focal length of your lens.
If you turn on DoF checkbox Focal Plane will show in the viewport and Depth of Field will be turned on. All the settings that I mentioned will influence DoF thickness and Focus plane will change size depending on the settings chosen.
FILE MANAGEMENT:
In the Lookdev Kit 2.0 you can use your own HDR images. I've added this feature because a lot of people use different HDRs. So more flexibility :)
Refresh HDRs - Deletes old and generates new HDR preview images for Ui and .tx files for all .hdr and .exr files in the HDR Folder.
Del Tx/jpg - Deletes generated HDR preview images for Ui and .tx files
Open HDR folder - Opens a folder that contains HDRs used in Lookdev kit. You can delete the included HDRs, paste your HDR files here or use both in the same time. When you paste additional files press the Refresh HDRs button.
TURNTABLE:
You can select your objects, choose turntable length in frames and click Setup Turntable button. It will create a Lookdev scene and create all of the constraints and animations that are necessary. First half of the timeline is reserved for object rotation,and second part for Skydome rotation.
If you want to change the length of the turntable just select your objects again, choose different length and click Setup Turntable button again. Obj. Rot. Offset allows you to manually rotate your object, without influencing already present animation.
SubD Settings:
SubD settings are used to turn on or off render time catclark subdivision. Also there is slider for choosing how many subD iterations you want. You have to select object to control SubD settings.
MtoA Constants:
Create mtoa_constant_ attributes. Just select object, type name in the text field, choose data type and click create. After that use aiUserData nodes to read created attributes.
KNOWN BUGs:
When you run a Refresh HDRs command and the process has finished, the Ui of the Lookdev kit should restart itself, but sometimes it does not... I'm still fixing this. Same thing happens when you run Del tx/jpg command. If this happens just click on the LDV_kit button in your shelf again. It will generate the Ui again.
Also, if something bugs out, or crashes, try running script again, or restart Maya.
In the end, Lookdev kit 2.0 is FREE tool, so use it as is. I will try to minimize bugs and crashes.
If you have any advices, ideas or anything else feel free to contact me.
I made it in my free time and that's why it took a while to finish. Consider leaving small tip when you download it.
Cheers!